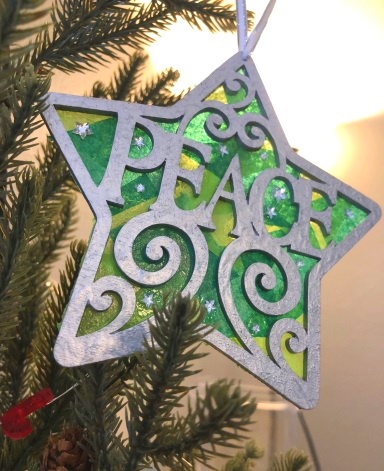
DIY Stained Glass (Tissue Paper) Christmas Ornament Instructions
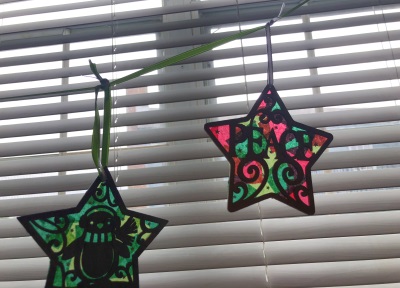
I love how these ornaments turned out! Making my own ornaments has become somewhat of a holiday tradition. This year I created a stained-glass look by using tissue paper and wood frames. My kids had fun helping me with these, although there were a few parts to this project that were a bit too difficult that the kids couldn’t manage. Overall we had a great time making them and they turned out beautifully.
How to Make a Stained Glass Ornament
Materials Needed
- Thin wood ornaments ready to be painted: We bought ours at Michael’s Craft store for $2 each. I also saw some options online on Amazon.
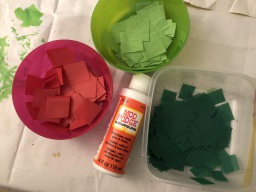
- Tissue paper
- Mod podge
- Scissors
- Paint brushes
- Acrylic paint – They have small bottles of every color imaginable at Michael’s
- Ribbon in two colors
- Sticky scrapbooking bling stars
Instructions
1. Paint the ornaments. This is a great step for kids to help out with. I covered my entire table with cut up paper bags and then let them have at it!
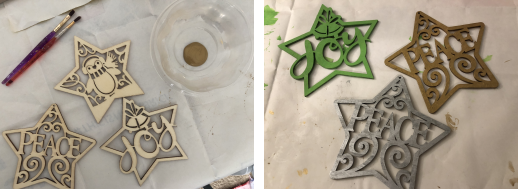
2. Let them dry completely.
3. Cut out a bunch of little tissue squares while you are waiting. We used three colors, a dark evergreen, a light green, and red.
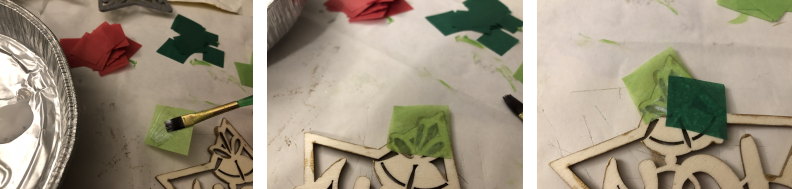
4. Flip the ornaments over, and start gluing the tissue paper squares to the back using Mod Podge.
- Paint the part of wood on the ornament with glue where you want to place the paper.
- Take one tissue paper square and use a paint brush to cover it with a thin layer of glue. Flip it over so that the part of tissue paper with the glue layer is face-down and attach it to the back of the ornament. (When you flip the ornament to the front, this will create the effect of the tissue being shiny once it dries.)
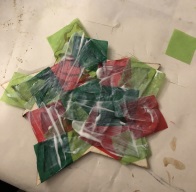
- Continue in this manner, criss-crossing the tissue paper and laying it to create the stained-glass effect.
5. Once the entire back is covered, place down one full layer of Mod Podge across the entire back.
6. Allow to dry.
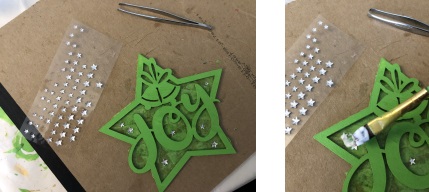
7. For added effect, we put little bling stars on! I found these in the scrapbooking section of the store. I used a tweezer to apply them, and then covered with Mod Podge to secure in place.
8. Add the finishing touches. Slice off the excess tissue paper from the edge of the ornaments. I placed them on a thick piece of cardboard before I began this. Then add the ribbon at the top.
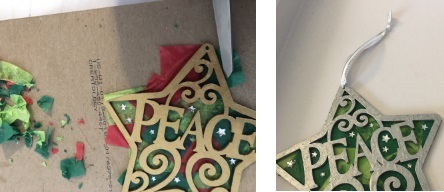
9. Hang on a window and enjoy!
Tips and Tricks
- When applying the tissue paper, it’s easiest if you line up the corners on the wood, it’s more difficult if you leave a corner floating in space in the middle of one of the cutout holes.
- I used a tweezer to lift off the tissue if I messed up and wanted to move it somewhere else.
- The tissue paper application was difficult for the kids, it was too fussy and the tissues would get stuck to their fingers and rip. I helped quite a bit with my toddler’s ornament.
Summary
These stained glass window ornaments made using tissue paper are fun to make and easy enough for kids to help on some of the steps. I hope you have fun making these, and that they bring a little holiday cheer into your home!
Please share this tutorial with your friends and thank you for stopping by!
HealthyYogaMom is written by Tess, a writer and mother of two. Check out my book at the Amazon link below!